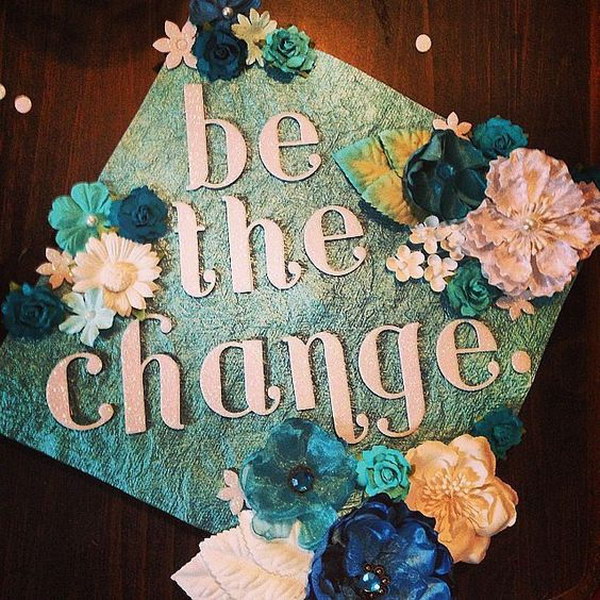
5 Essential Supplies to Decorate Your Graduation Cap

Graduation is one of life's most memorable milestones, symbolizing the culmination of years of hard work, dedication, and growth. A unique and increasingly popular tradition among graduates is to personalize their graduation caps, adding a touch of creativity and individuality to the ceremony. Whether you're an art student looking to showcase your flair or someone simply wishing to make your cap memorable, here are five essential supplies you'll need to decorate your graduation cap.
1. Quality Cardstock or Fabric

Why it matters: The base of your cap decoration is critical. Quality cardstock or fabric provides durability, ensuring your design stays intact throughout the ceremony and any subsequent celebrations.
- Cardstock: Look for thick, acid-free cardstock that will not only hold shapes well but also be less likely to tear. You can also consider water-resistant cardstock if your designs involve wet mediums.
- Fabric: For those wanting a more 3D effect or something soft to touch, choose fabric like felt or satin. Fabric also offers flexibility for more complex designs involving draping or layering.
💡 Note: When cutting your cardstock or fabric, ensure to measure your cap accurately to avoid any overhang or gaps in your design.
2. Adhesives

Why it matters: Without proper adhesives, even the most intricate design will fail. Here are your options:
- Hot Glue Gun: Ideal for quick setting and strong bonding, especially when dealing with fabric or heavy decorations. However, caution must be taken as it can get quite hot.
- Double-Sided Tape: Offers a clean look and is perfect for lightweight elements like ribbons or small, flat objects.
- Mod Podge: Useful for sealing and adhering paper elements or creating a glossy or matte finish over your design.
3. Embellishments

Why it matters: These are the stars of your cap’s story, adding character and personality:
- Ribbons and Tassels: They add movement and can frame or highlight different sections of your cap.
- Stickers, Decals, and Embroidery: For quotes, symbols, or intricate designs, these options provide professionalism without the need for advanced art skills.
- Gems and Rhinestones: These catch the light, making your cap stand out in photos or from a distance.
- Small Figurines: From superheroes to pop culture icons, these can personalize your cap in a unique way.
🌟 Note: Balance is key. Too many embellishments can make your cap look cluttered; use them wisely to enhance, not overwhelm, your design.
4. Tools for Precision

Why it matters: For the cleanest finish and precise application:
- Scissors or Craft Knife: Precision cutting is essential for intricate designs.
- Ruler or Straightedge: To ensure straight cuts and for measuring your design elements.
- X-Acto Knife: For fine details where scissors can’t go.
- Paintbrushes: For applying glue or paint with precision.
- Small Tweezers: Perfect for placing small decorations accurately.
5. Protective Topcoat

Why it matters: Your creation needs protection:
- Clear Acrylic Spray: Provides a clear, protective layer over your design, preventing smudging, and adds a subtle shine.
- Sealant: For fabric or textured elements, use a fabric-specific sealant to keep everything in place and protected.
By considering these supplies, you're setting the stage for a cap that not only looks great but also stands up to the test of the ceremony day. Your cap will be your canvas, where you can express gratitude, celebrate your achievements, or simply add a humorous touch that reflects your personality.
Remember, the key to a successful cap decoration is preparation. Plan your design, gather your supplies, and take your time to apply each element. The more you prepare, the smoother your decorating process will be. Celebrate your journey, share your creativity, and make your graduation cap a memorable piece of your academic history.
Can I use any glue for my graduation cap?

+
While you can use different types of glue, a hot glue gun is recommended for its quick setting time and strong adhesion, especially with fabric or heavier decorations. However, for lighter elements like paper or stickers, double-sided tape or Mod Podge can be more suitable.
How can I ensure my cap design lasts through the ceremony?

+
Use a protective topcoat like clear acrylic spray or a fabric sealant to keep your design from smudging or shifting. Applying a few light coats will provide a durable layer without affecting the appearance.
What if my design doesn’t fit perfectly?

+
Try to measure your cap accurately before starting. If your design is too large, you can either reduce the scale or creatively work around it by cutting out sections or adding border elements to frame your design.


