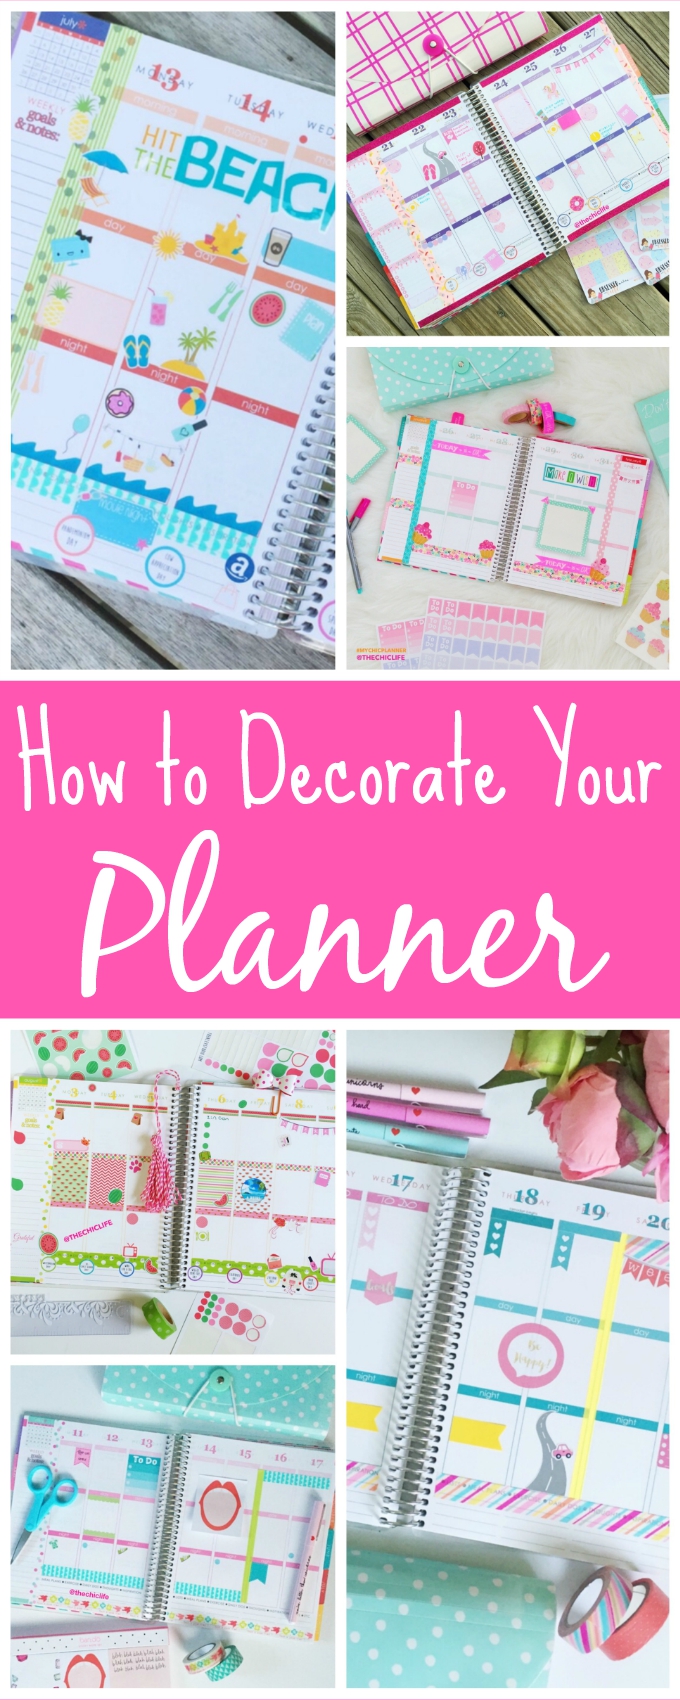
Decorate Your Planner: Boost Creativity and Organization

One of the most delightful parts of planning is the creative process involved in decorating your planner. A planner isn't just a tool for scheduling your tasks and appointments; it's a canvas where you can express your creativity, which in turn can boost your motivation and productivity. Whether you're a seasoned planner decorator or just starting out, this blog post will guide you through the joys and benefits of making your planner a personalized piece of art.
Why Decorate Your Planner?

Before we dive into the how-to's, let's consider why decorating your planner can be a game-changer:
- Personalization: A planner decorated to your taste reflects your personality, making it more enjoyable to use daily.
- Motivation: A visually appealing planner can motivate you to stay organized and on track.
- Memory Keeping: Decorations can serve as mementos of your journey, preserving memories alongside your daily life.
Materials for Planner Decoration

Here's a list of common materials you might need to get started:
- Stickers (thematic, seasonal, or personal designs)
- Washi Tape
- Pens, Markers, and Highlighters
- Scrapbook Paper or Cardstock
- Stamps and Ink Pads
- Die-Cuts
- Stencils
- Adhesive Glitter or Gems
🌟 Note: When choosing materials, consider the thickness of your planner pages; heavy items can cause damage.
Techniques for Planner Decoration

Hand Lettering and Doodling

One of the simplest yet most effective ways to personalize your planner is through hand lettering and doodling:
- Hand Lettering: Use brush pens or fine liners to write out headers or important events creatively.
- Doodling: Fill empty spaces with quick sketches or patterns to add a touch of whimsy.
Using Stickers

Stickers can transform your planner:
- Functional stickers for marking events, priorities, or mood tracking.
- Decorative stickers to enhance the aesthetic appeal.
Washi Tape Creativity

Washi tape is incredibly versatile:
- Frame your planner's boxes or sections.
- Create borders or dividers.
- Add tabs to make navigation easier.
Paper Crafting

Die-cuts, scrapbook paper, and cardstock can add depth:
- Create layered layouts or pop-up elements.
- Add tabs, flags, or tabs for marking pages.
The Creative Process

Here's how you can approach the decoration of your planner:
- Set Your Theme: Decide on a theme or color scheme to unify your planner's look.
- Plan Your Layout: Sketch out what you want each page to look like before you start decorating.
- Layering: Start with the backgrounds (washi tapes, papers) and build up with stickers, writing, and other elements.
- Balance: Ensure there's a visual balance between decorative elements and the practical use of the planner.
🎨 Note: Remember, the goal is not perfection but enjoyment. Allow mistakes to be part of your unique style.
Integrating Planner Decorations with Productivity

While planner decoration is fun, it should complement your productivity, not hinder it:
- Use color coding to categorize tasks or events.
- Reserve space for writing notes, appointments, and lists.
- Keep decorations neat and not overly distracting.
Tips for Keeping Your Decorative Planner Practical

Here are some tips to ensure your planner remains both beautiful and functional:
- Only decorate where you have white space. Leave room for writing.
- Use erasable pens or pencils for more important entries to allow for changes.
- Schedule decoration sessions to keep them from taking over your planning time.
💡 Note: Functional elements should guide your creativity, not be overshadowed by it.
Decorating your planner isn't just about making it look pretty; it's an exercise in creativity, mindfulness, and personal expression. It's a way to make your daily planning more enjoyable, which can lead to better organization and productivity. By personalizing your planner, you're not just managing time and tasks; you're crafting a visual diary of your life that's uniquely yours. Whether you choose to enhance it with hand lettering, washi tapes, or vibrant stickers, remember that the process itself is as valuable as the end result. Let your planner be a testament to your creative spirit and an inspiring tool that you look forward to using every day.
What if I don’t have an artistic touch?

+
Artistic skills aren’t a prerequisite for planner decoration. Use stickers, washi tapes, and pre-made designs to add visual appeal without drawing or writing.
Can I make my planner less cluttered?

+
Yes, adopt a minimalistic approach. Use simple lines, geometric patterns, and limited color palettes to keep decorations clean and purposeful.
How do I balance decoration with functionality?

+
Plan your decoration around the functional parts of your planner. Reserve enough space for writing tasks, notes, and keeping track of your schedule while integrating decorative elements.


